How to send push notifications with Firebase, React and NestJS
Firebase Cloud Messaging (FCM) is a versatile cloud-based messaging platform that empowers app developers to send messages and notifications to users' devices, delivering text, images, links, and more. In this guide, we'll explore the benefits of using FCM and walk you through setting up FCM notifications in your web applications using React.js and Nest.js.
Benifits of using FCM:-
Cross-Platform: FCM works on Android, iOS, and web apps, simplifying multi-platform messaging.
Reliability: FCM is known for its dependable message delivery, even during high-demand periods.
Cost-Effective: It offers a free tier suitable for most small to medium-sized apps.
Security: Ensure secure communication between servers and devices.
Cloud Integration: Easily integrates with other Firebase services for enhanced functionality.
Create Firebase project:
Go to the Firebase Console: Visit the Firebase Console by going to https://console.firebase.google.com/.
Sign In: Sign in with your Google account. If you don't have one, you'll need to create a Google account first.
Add a New Project: Click on the "Add project" button to create a new Firebase project.
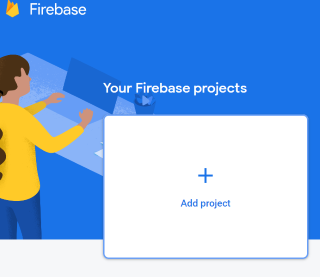
Enter Project Name: Give your project a name. This name should be unique within Firebase, so choose something descriptive.
(Optional) Set Up Google Analytics: You can choose to enable Google Analytics for your project. This will help you gather data about your app's usage. You can also enable this later if needed.
Click "Create Project": Once you've filled in the necessary information, click the "Create Project" button.
Wait for Project Creation: Firebase will set up your project, which may take a moment.
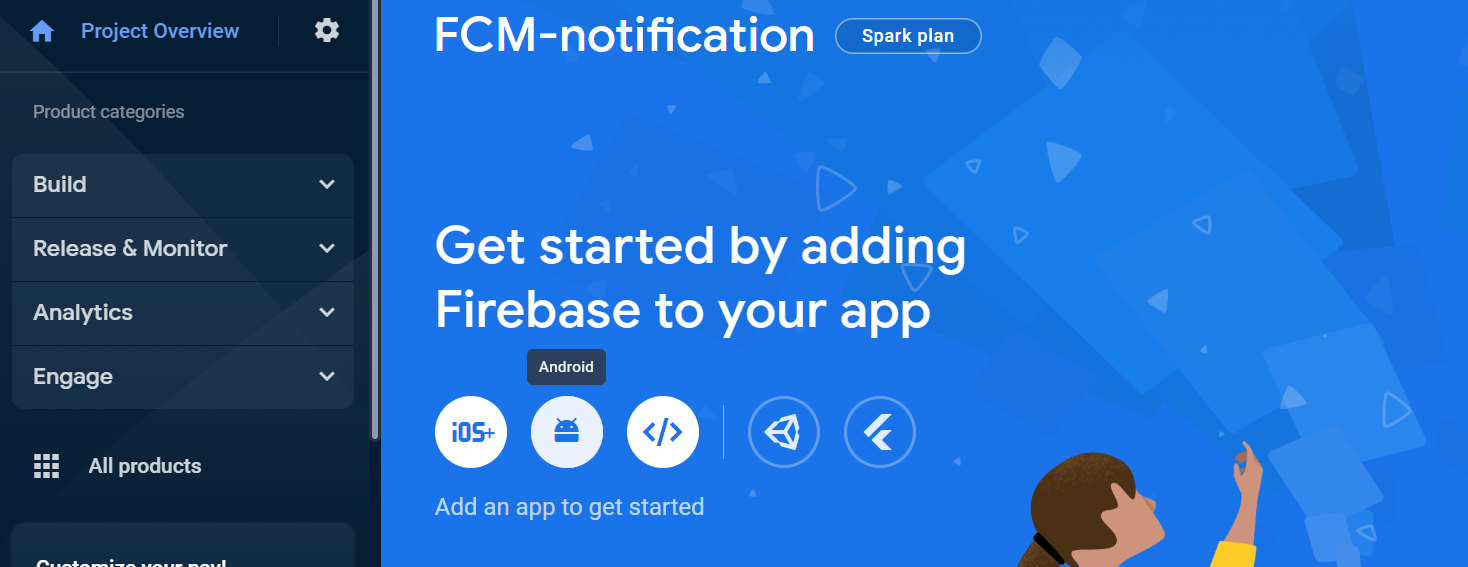
Project Created: Once the project is created, you'll be taken to the project dashboard, where you can see the below image.
How to set up your Firebase project?
Here's a step-by-step guide.
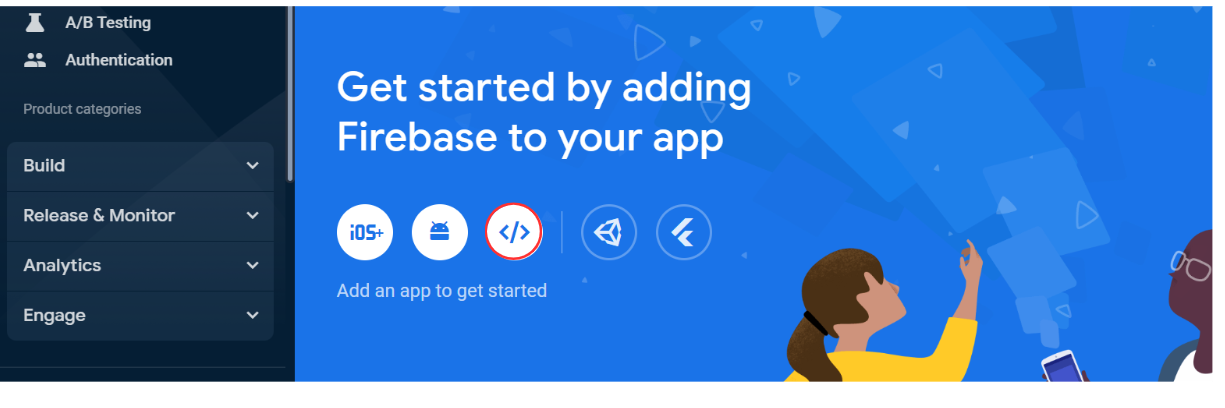
- Click on web notification button.
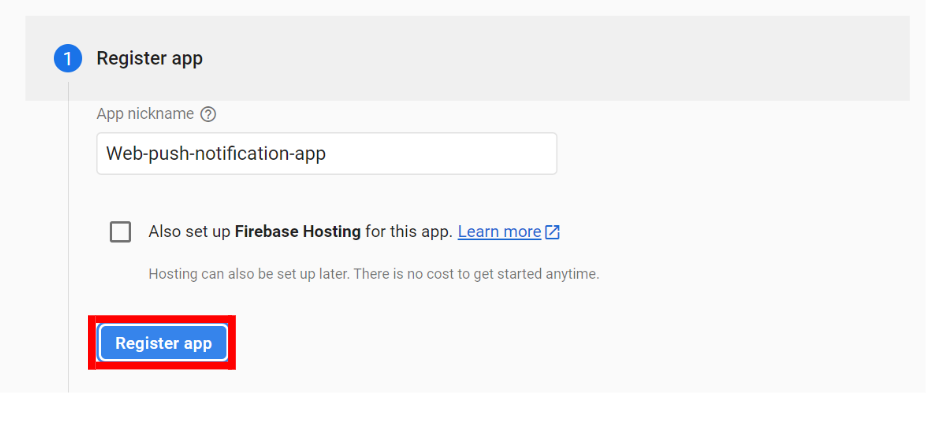
Click on 'Register app' button.
Now set up your firebase to your react-app
Create your react app.
Install Firebase in your React app
Create a firebase.js file inside your src folder.
 const firebaseConfig = const firebaseConfig = {
   apiKey: "YOUR_API_KEY",
   authDomain: "YOUR_AUTH_DOMAIN",
   projectId: "YOUR_PROJECT_ID",
   storageBucket: "YOUR_STORAGE_BUCKET",
   messagingSenderId: "YOUR_MESSAGING_SENDER_ID",
   appId: "YOUR_APP_ID"
 };
   // Initialize Firebase
   export const app = initializeApp(firebaseConfig);
   export const messaging = getMessaging(app);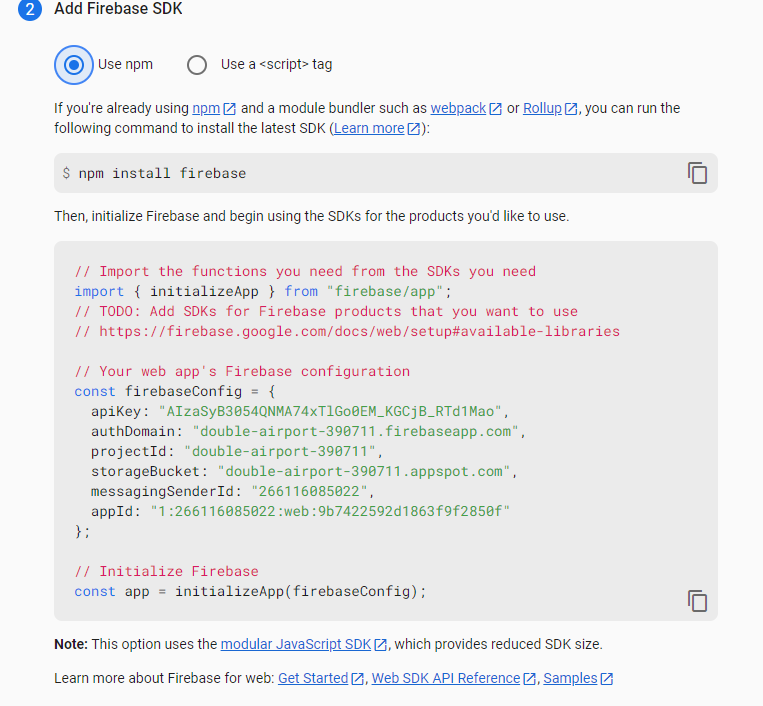
Replace firebaseConfig with your firebase project firebaseConfig object.
open app.jsx.
  import { useEffect } from "react";
  import { messaging } from "./firebase";
  import { getToken } from "firebase/messaging";

  import "./App.css";

  function App() {

    async function requestPermission() {
      const permission = await Notification.requestPermission();
      if (permission === "granted") {
        // Generate Token
        const token = await getToken(messaging, {
          vapidKey: Your_Vapid_key
            // replace with your vapid key,
        });
        console.log("Token Gen", token);
        // Send this token  to server ( db)
      } else if (permission === "denied") {
        alert("You denied for the notification");
      }
    }

    useEffect(() => {
      // Req user for notification permission
      requestPermission();
    }, []);

    return (
      <div className="App">
        <h1>Push notification service</h1>
      </div>
    );
  }

  export default App;
For the code snippet above, you'll need to generate your project's Vapid key. Here are the steps.
Go to
Project settings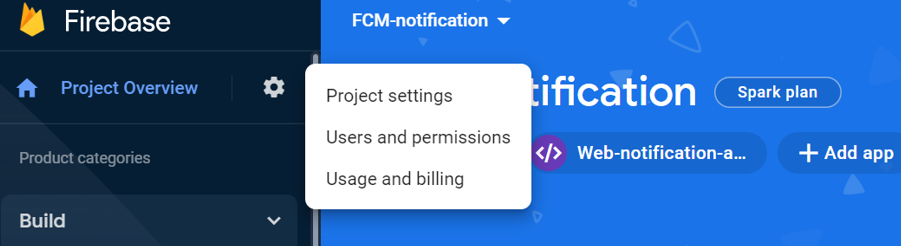
Click on
cloud messagingoption.
Scroll down and click on
Generate key pairbutton. This action will generate a string, which will serve as your Vapid key.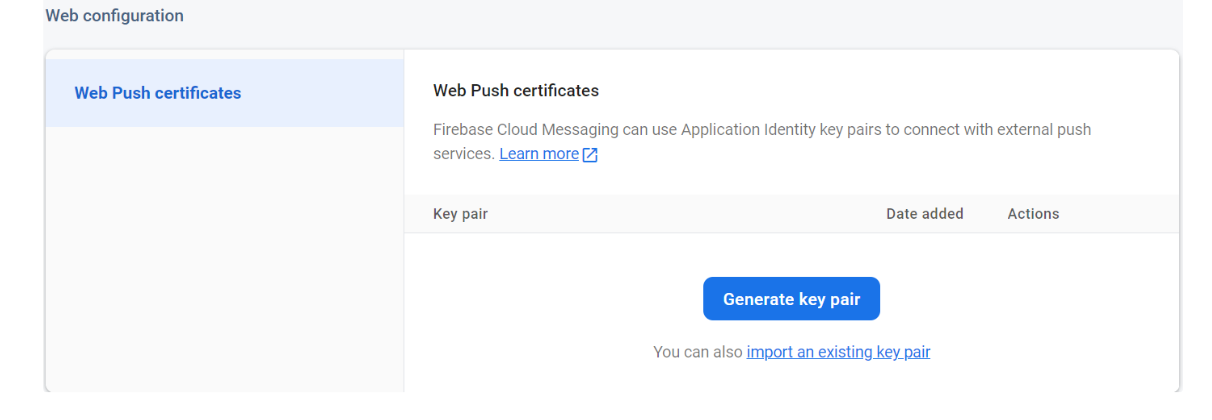
- Now, run your React app using the
npm run starcommand. Open your console, and you will be able to see that your token has been successfully generated.
Create a file firebase-messaging-sw.js in the public folder.
importScripts("https://www.gstatic.com/firebasejs/8.10.0/firebase-app.js");
importScripts(
  "https://www.gstatic.com/firebasejs/8.10.0/firebase-messaging.js"
);
const firebaseConfig = {
  apiKey: "YOUR_API_KEY",
  authDomain: "YOUR_AUTH_DOMAIN",
  projectId: "YOUR_PROJECT_ID",
  storageBucket: "YOUR_STORAGE_BUCKET",
  messagingSenderId: "YOUR_MESSAGING_SENDER_ID",
  appId: "YOUR_APP_ID"
};

const app = firebase.initializeApp(firebaseConfig);
const messaging = firebase.messaging();

messaging.onBackgroundMessage((payload) => {
  console.log(
    "[firebase-messaging-sw.js] Received background message ",
    payload
  );
  const notificationTitle = payload.notification.title;
  const notificationOptions = {
    body: payload.notification.body,
    icon: payload.notification.image,
  };
  self.registration.showNotification(notificationTitle, notificationOptions);
});
Here's a simplified explanation of the code:
We include two Firebase JavaScript libraries: 'firebase-app.js' and 'firebase-messaging.js.'
We configure Firebase with the 'firebaseConfig' object, which contains various settings for our app.
We initialize the Firebase app and messaging service.
We set up a listener for background messages, which allows our app to receive messages even when it's not in the foreground.
When a background message is received, we log it to the console and extract the notification title, body, and icon.
Finally, we display the notification using the extracted title, body, and icon.
This code is essential for enabling push notifications in your web app with Firebase.
Now set up your firebase with NestJS:-
Create nestJS project and install firebase-admin package.
 //run this command
 nest g resource fcm-notification //for creat fcm-notificatiob module
 npm install firebase-admin // for install firebase-admin to your project
Now go to
fcm-notification.Service.tsimport { Injectable } from '@nestjs/common'; import * as admin from 'firebase-admin'; admin.initializeApp({ credential: admin.credential.cert({ projectId: PROJECT-ID, // replace with your app project-ID clientEmail: CLIENT-KEY, //replace with your app CLIENT-KEY privateKey: PRIVATE-KEy //replace with your app PRIVATE-KEy }), }); @Injectable() export class FcmNotificationService { constructor() { } }Above code, we are importing
adminis imported as a namespace from 'firebase-admin. Nextadmin.initializeApp({ ... })initializes the Firebase Admin SDK with the provided configuration.
To access your Admin SDK configuration details, navigate to your project settings and select 'Service accounts.' From there, you cangenerate a new private keyin the form of a downloadable JSON file, which will serve as your admin SDK configuration. For reference, please consult the image below.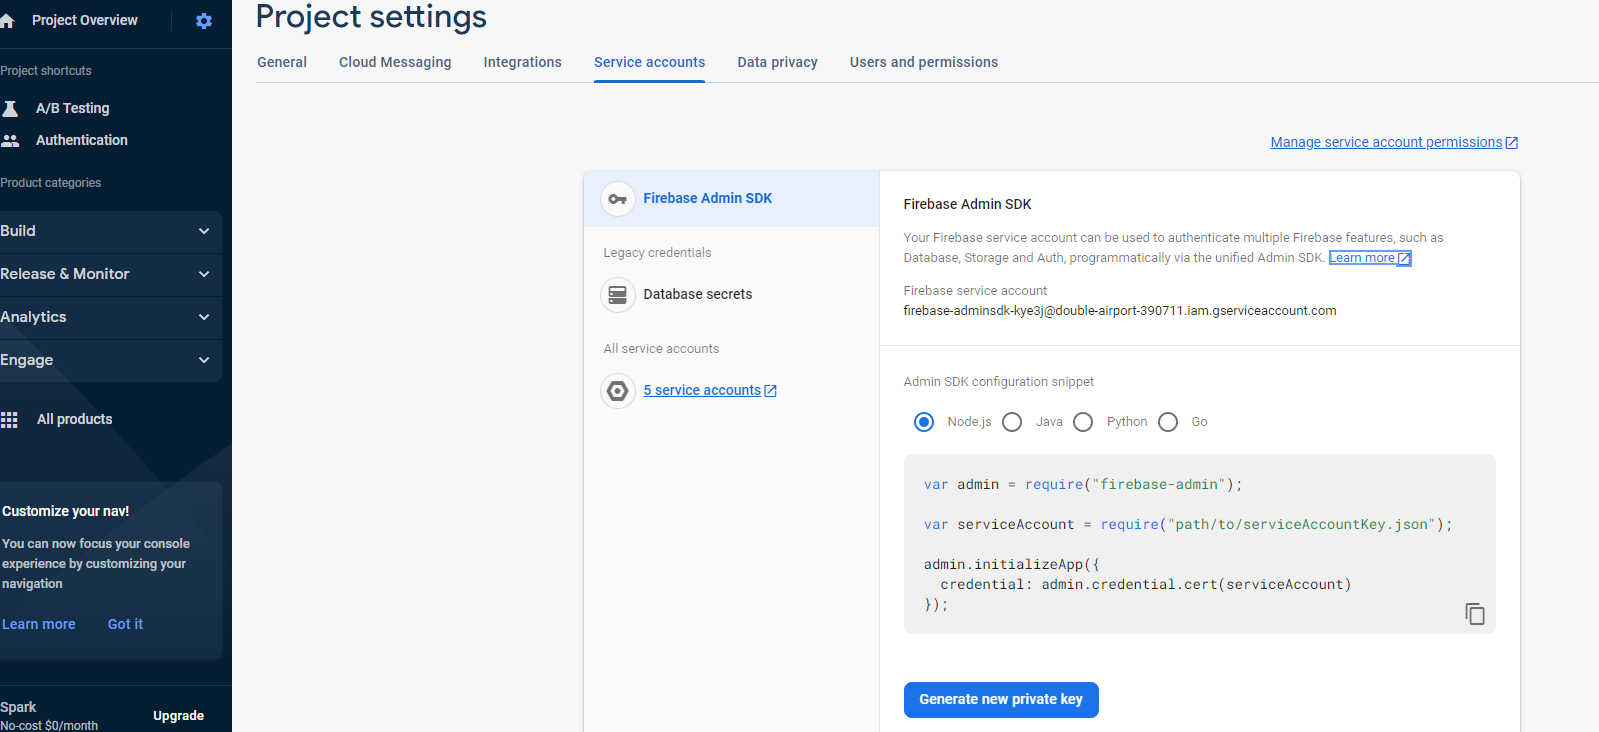
Now add sending notification function to your service folder.
 import { Injectable } from '@nestjs/common';
 import * as admin from 'firebase-admin';

 admin.initializeApp({
   credential: admin.credential.cert({
     projectId: PROJECT-ID,
     clientEmail: CLIENT-KEY,
     privateKey: PRIVATE-KEy
   }),
 });
 @Injectable()
 export class FcmNotificationService {
   constructor() {
   }

   async sendingNotificationOneUser(token:string) {
     const payload= {
       token: token
       notification: {
         title: "Hi there this is title",
         body: "Hi there this is message"
       },
       data: {
         name:"Joe",
         age:"21"
       }
       }
     return admin.messaging().send(payload).then((res)=>{
       return {
           success:true
       }

     }).catch((error)=>{
       return {
         success:false
       }
     })
   }
 }
The
sendingNotificationOneUserfunction sends a notification to a specific user. It uses the user's device token to target them, constructs the notification content (title, body, and additional data), and sends it through Firebase. If successful, it returnssuccess: true; otherwise, it returnssuccess: false.Now go to Fcm-Notification.controller.ts.
 import { Controller, Get, Post, Body, Patch, Param, Delete } from '@nestjs/common';
 import { FcmNotificationService } from './fcm-notification.service';

 @Controller('firebase')
 export class FcmNotificationController {
   constructor(
     private readonly sendingNotificationService: FcmNotificationService,
    ) {}

   @Post('send-notification/')
   async sendNotidication(@Body() body:{ token: string }) {
   const {token}=body
    return await this.sendingNotificationService.sendingNotificationOneUser()
   }
 }
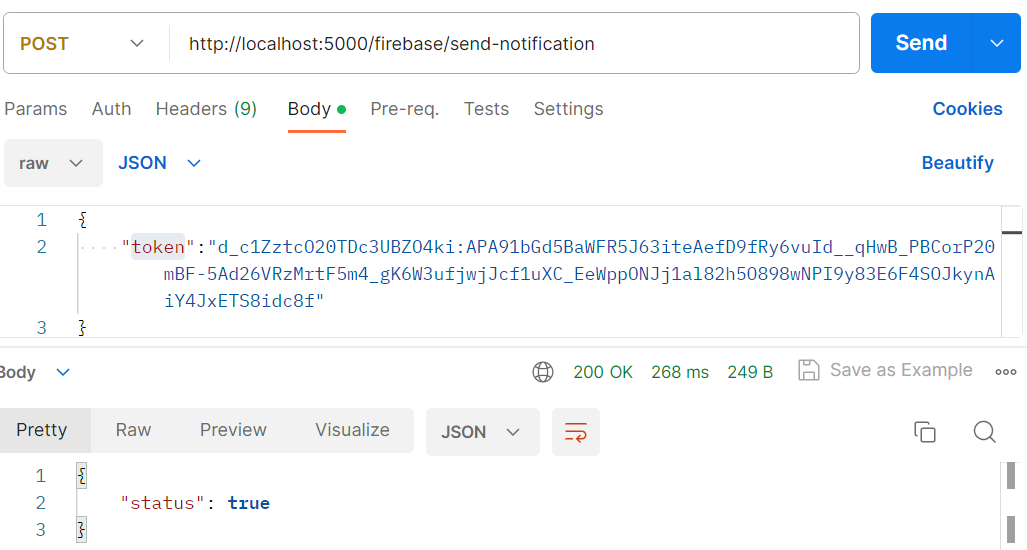
In the code snippet provided, a route for sending notifications is defined in a NestJS controller. When a POST request is made to '/firebase/send-notification/', the function
sendNotidicationis called. It expects a JSON body with a 'token' field, which is passed to thesendingNotificationOneUserfunction from theFcmNotificationService. The result of the notification sending process is returned in the response.
Making a Request with Postman:-
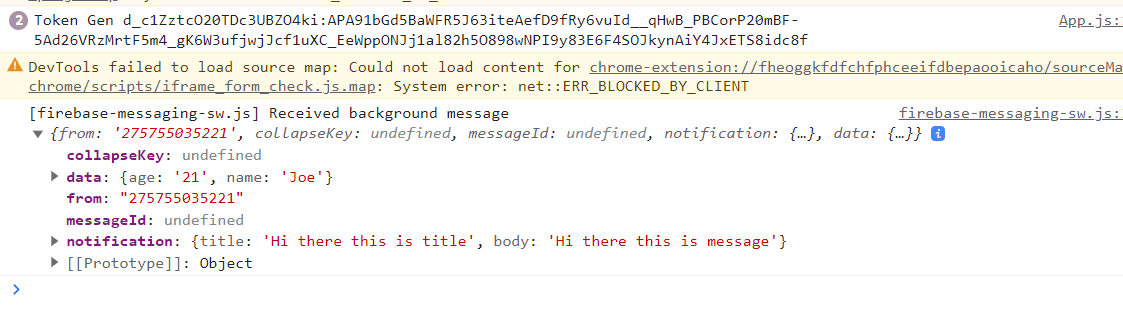
That's all for now. I hope you find this tutorial helpful! Feel free to leave feedback or questions below, I would love to hear and work on them. Thank you :)
About the author
SDE-1 at pococare.
Comments
Join the discussionNo comments yet. Be the first to comment.